
.xyz domain is only €0.91 at Namecheap
In my last blog post I used an ex-email provder’s old domain to jumpstart an email honeypot. But because this used to be a legitimate email provider domain with legitimate email accounts, the honeypot also receives a lot of legitimate email, including but not limited to:
So I won’t be able to share the email stream of that spamtrap publicly. However, in this blog post I outline the complete setup. All you need is:
You will need a domain name.
A very cheap option is a .xyz domain from Namecheap:
.xyz domain is only €0.91 at Namecheap
The .xyz domain at Namecheap also includes WhoisGuard:

WhoisGuard is forever free at Namecheap
WhoisGuard prevents your real information from being listed in the WHOIS record of the domain. Of course you could also register the domain with wrong information. However, you could also quickly loose the domain because of that, which would be a shame if you already put efforts into getting spammers to send spam to your domain.
Buy a domain.
Update 1: Please note that VPSCHEAP.NET uses OpenVZ. Later CentOS 7 firewalld versions require the nf_conntrack kernel module, which unfortunately isn’t provided by the kernel version currently running on VPSCHEAP.NET VPS servers. So to get a setup with working firewall you may want to choose a different VPS provider.
A very cheap option I found is https://vpscheap.net/. Because you don’t care about uptime or privacy of your spamtrap you can go cheap here.
Select CentOS 7 64bit as the operating system (the script will only work with CentOS 7) and no other addons:
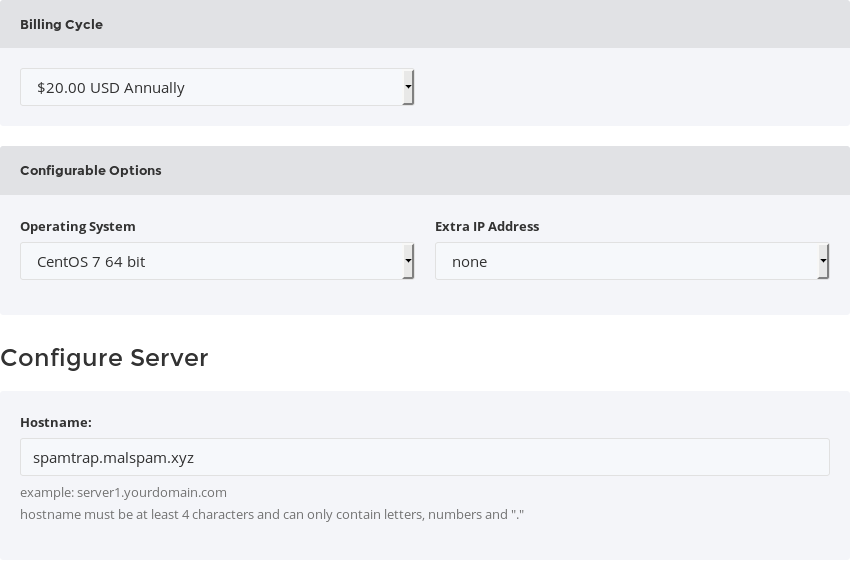
VPSCHEAP NET ordering options: CentOS 7 as OS, no other addons
Also enter your hostname. I choose the subdomain spamtrap on my xyz domain.
After you bought it copy its IP address and set a root password:
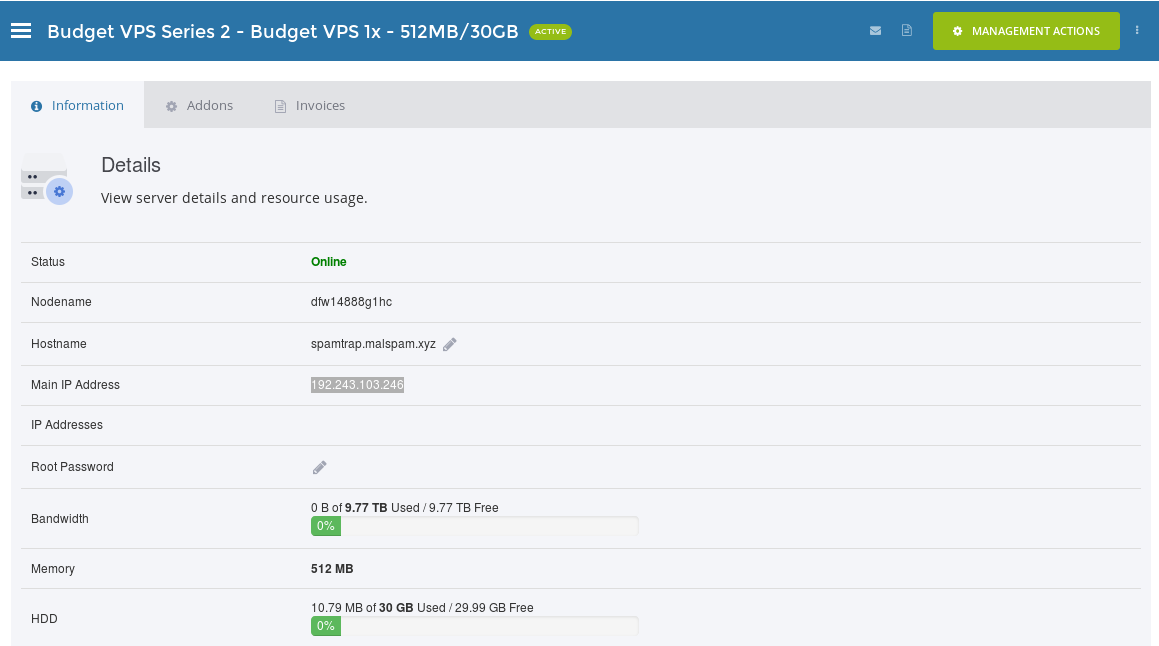
VPSCHEAP NET copy IP of server
Cloudflare provides a great free DNS service. Once you log into Cloudflare do the following:

spamtrap.domain.tld. IN A
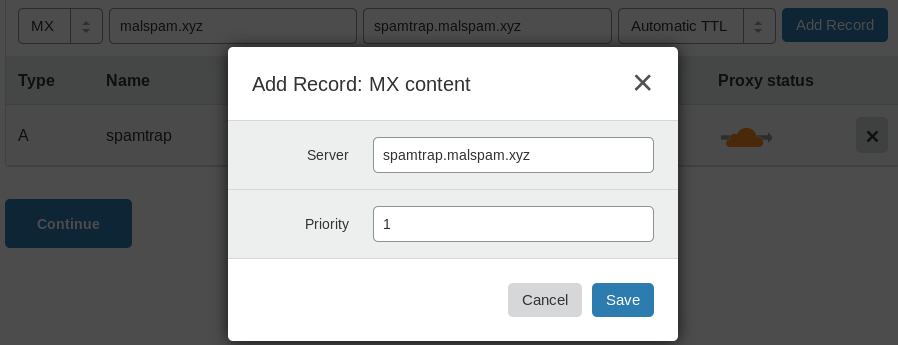
domain.tld. IN MX 1 spamtrap.domain.tld
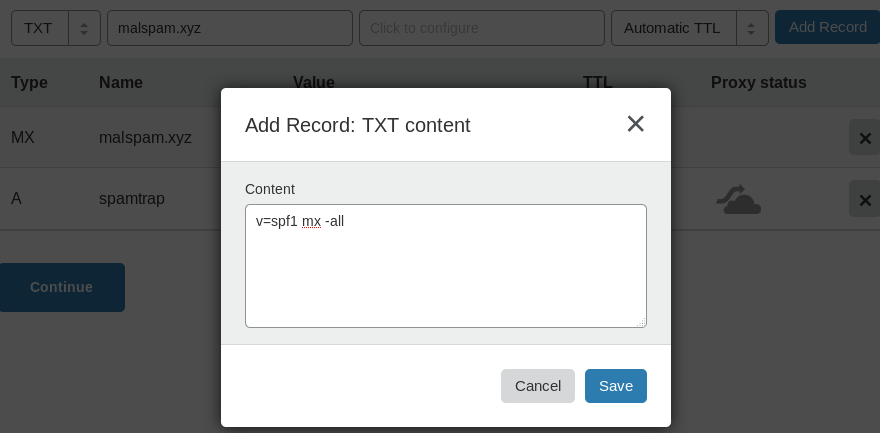
domain.tld. IN TXT “v=spf1 mx -all”

Setting “Custom DNS” at Namecheap
After this the setup period for your server should be over and it should up and running.
Download the install scripts: github.com/threatrack/el7-spamtrap
Install the Spamtrap by following the instructions in the Github project. (Please report any issues in the Github project.)
This takes a while …
Update 1: Please refer to the README of the Github project for the up to date configuration! The following text is just for archival purpose of the original blogpost:
All configuration is optional.
The hostname of the spamtrap is spamtrap.invalid. You can change this in /etc/postfix/main.cf (myhostname = spamtrap.invalid). However, you then must change /^root@spamtrap\.invalid$/ in /etc/postfix/vmaps as well (and run postmap /etc/postfix/vmaps afterwards to generate the vmaps.db).
In /etc/postfix/main.cf there are comments tagged with MORESPAM with suggestions for lines that can be commented for more spam. However, that spam will then be super low quality stuff.
Postfix is configured to not send any outbound mail at all. So if you would like to change that you need to edit /etc/postfix/main.cf (around # DO NOT SEND ANY MAIL AT ALL) and also setup SASL authentication.
Please note the server does automagic updates including reboots if they are indicated by an update! If you need an update schedule or some such feel free to edit /etc/cron.hourly/9needs-restarting.cron to schedule the checks for reboots differently.
The emails will go to /home/vmail/spamtrap.invalid/spamtrap/new/. System emails (root@localhost) will go to /home/vmail/spamtrap.invalid/root/new/.
dig +short mx <domain.tld>1 spamtrap.<domain.tld>nc spamtrap.<domain.tld> 25220 spamtrap.invalid ESMTP
HELO <the hostname of your ip you connect to the SMTP>
250 spamtrap.invalid
MAIL FROM:<root@localhost.localdomain>
250 2.1.0 Ok
RCPT TO:<test@test.tld>
250 2.1.5 Ok
DATA
354 End data with <CR><LF>.<CR><LF>
Subject: Test
Test
.
250 2.0.0 Ok: queued as 6779A1301D08
QUIT
221 2.0.0 Bye(If you don’t know how to send email via SMTP commands send a regular mail to whatever@<domain.tld>)
ssh root@<yourip>ls /home/vmail/<yourdomain/spamtrap/new/cat /home/vmail/<yourdomain/spamtrap/new/*(NOTE: Depending on what domain you registered you may not receive any email at all until you spread your email addresses so spammers can find them.)
Update 1: The el7-spamtrap Github project also contains a simple POP3s setup to download emails via a local email client, e.g., Thunderbird.
/var/log/maillogsystemctl reload postfix or systemctl reload opendkimNOTE: Please note this install does (aggressive) auto updates. It will check for updates, download and install them and if indicated will also perform a reboot. Reboots are performed via shutdown -r so users on the system should get 1 minute to abort the shutdown with shutdown -c.
In case you are having any other problems feel free to DM me on Twitter.
This install script now already includes the DKIM and SPF checks (Authentication-Results and Received-SPF headers). So you can see whether the emails have been signed and were valid under SPF.
I will also share further improvements to this.
But for now everyone can setup their own spamtrap with minimal time effort and only 20 € (the first year).